


Camera settings in the MixUp app.
If you use not the new camera, then don't forget to reset the camera to the default settings. Guide for the M50.
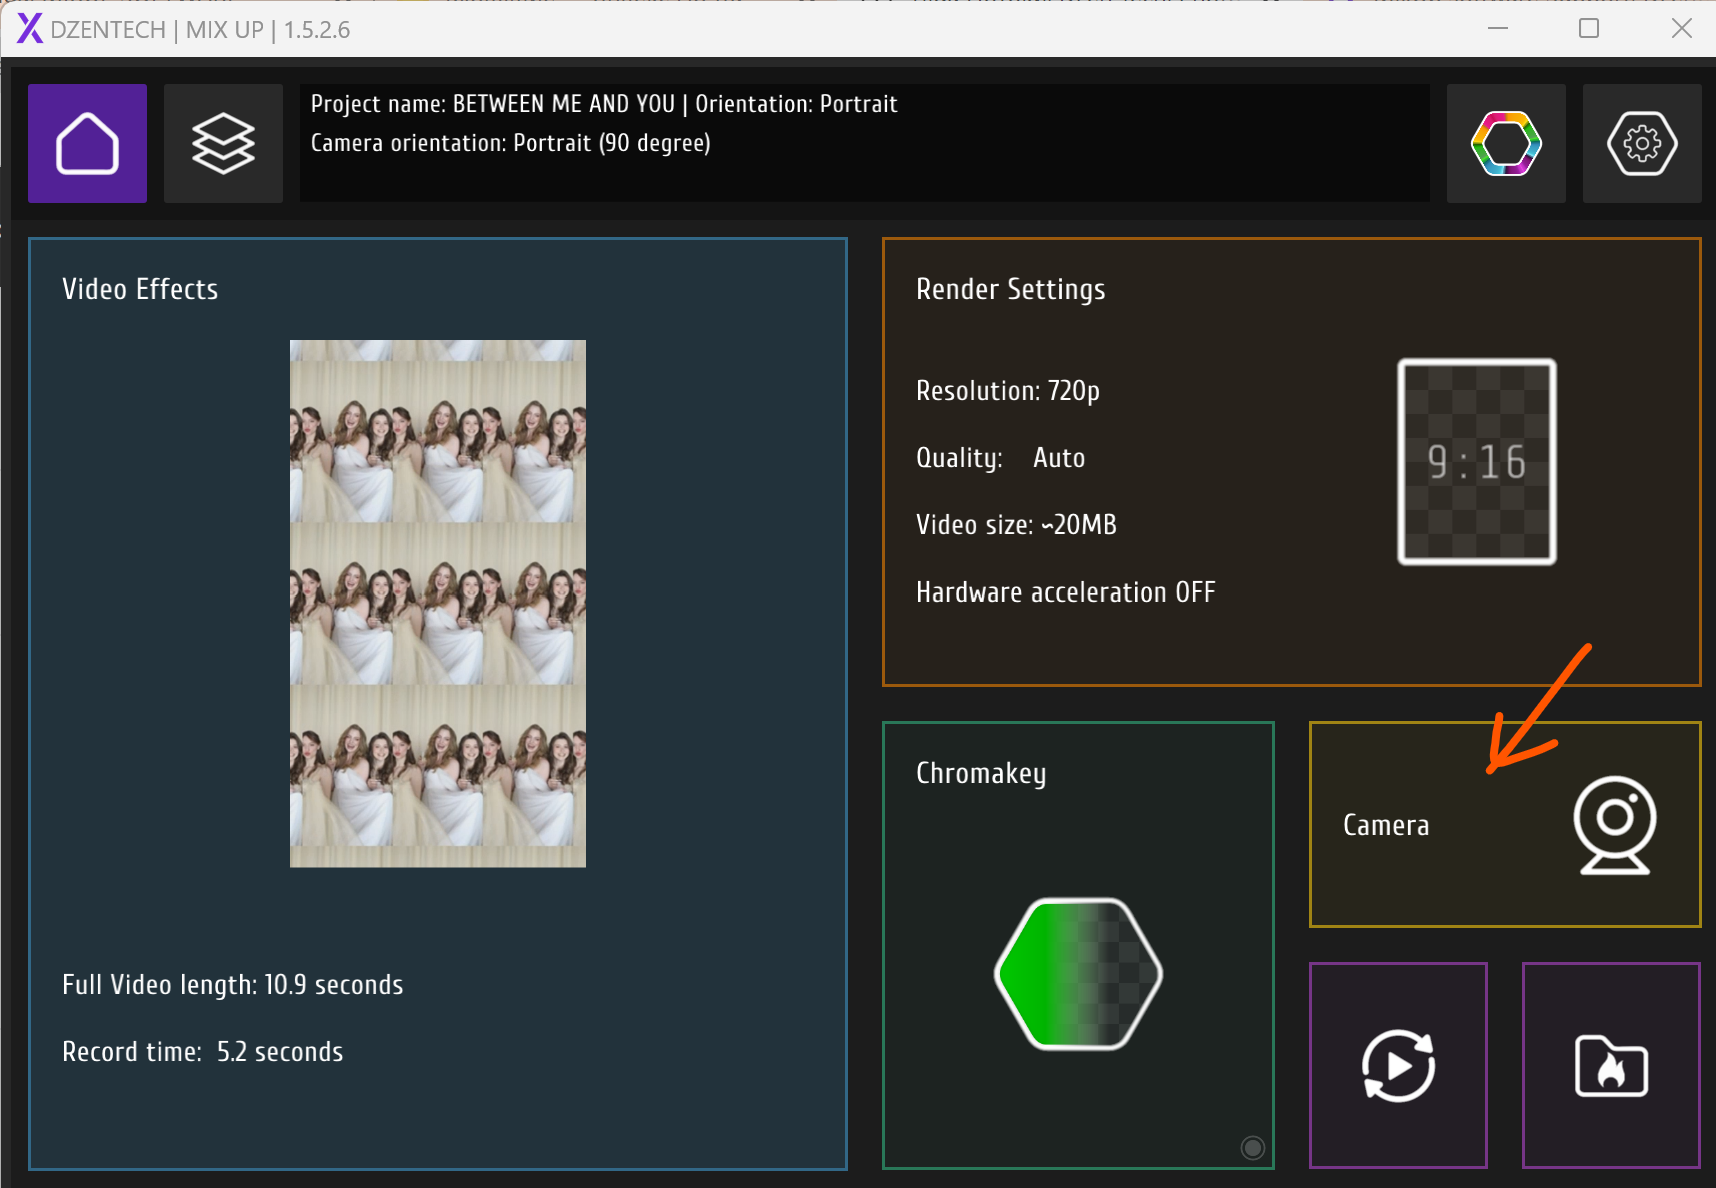
You can change your camera settings from the main screen of the app.
The camera must be connected to the USB port of the MixUp photo booth or to your laptop directly. Our software works with all Canon cameras (all other camera models can be connected by video capture device. Please text to our managers for more info). We recommend using Canon M50.
The camera must be connected to the USB port of the MixUp photo booth or to your laptop directly. Our software works with all Canon cameras (all other camera models can be connected by video capture device. Please text to our managers for more info). We recommend using Canon M50.
Important! Camera must have a memory card and to be set in M mode.
Check that the camera is turned on, and it saves JPEG files (not RAW).
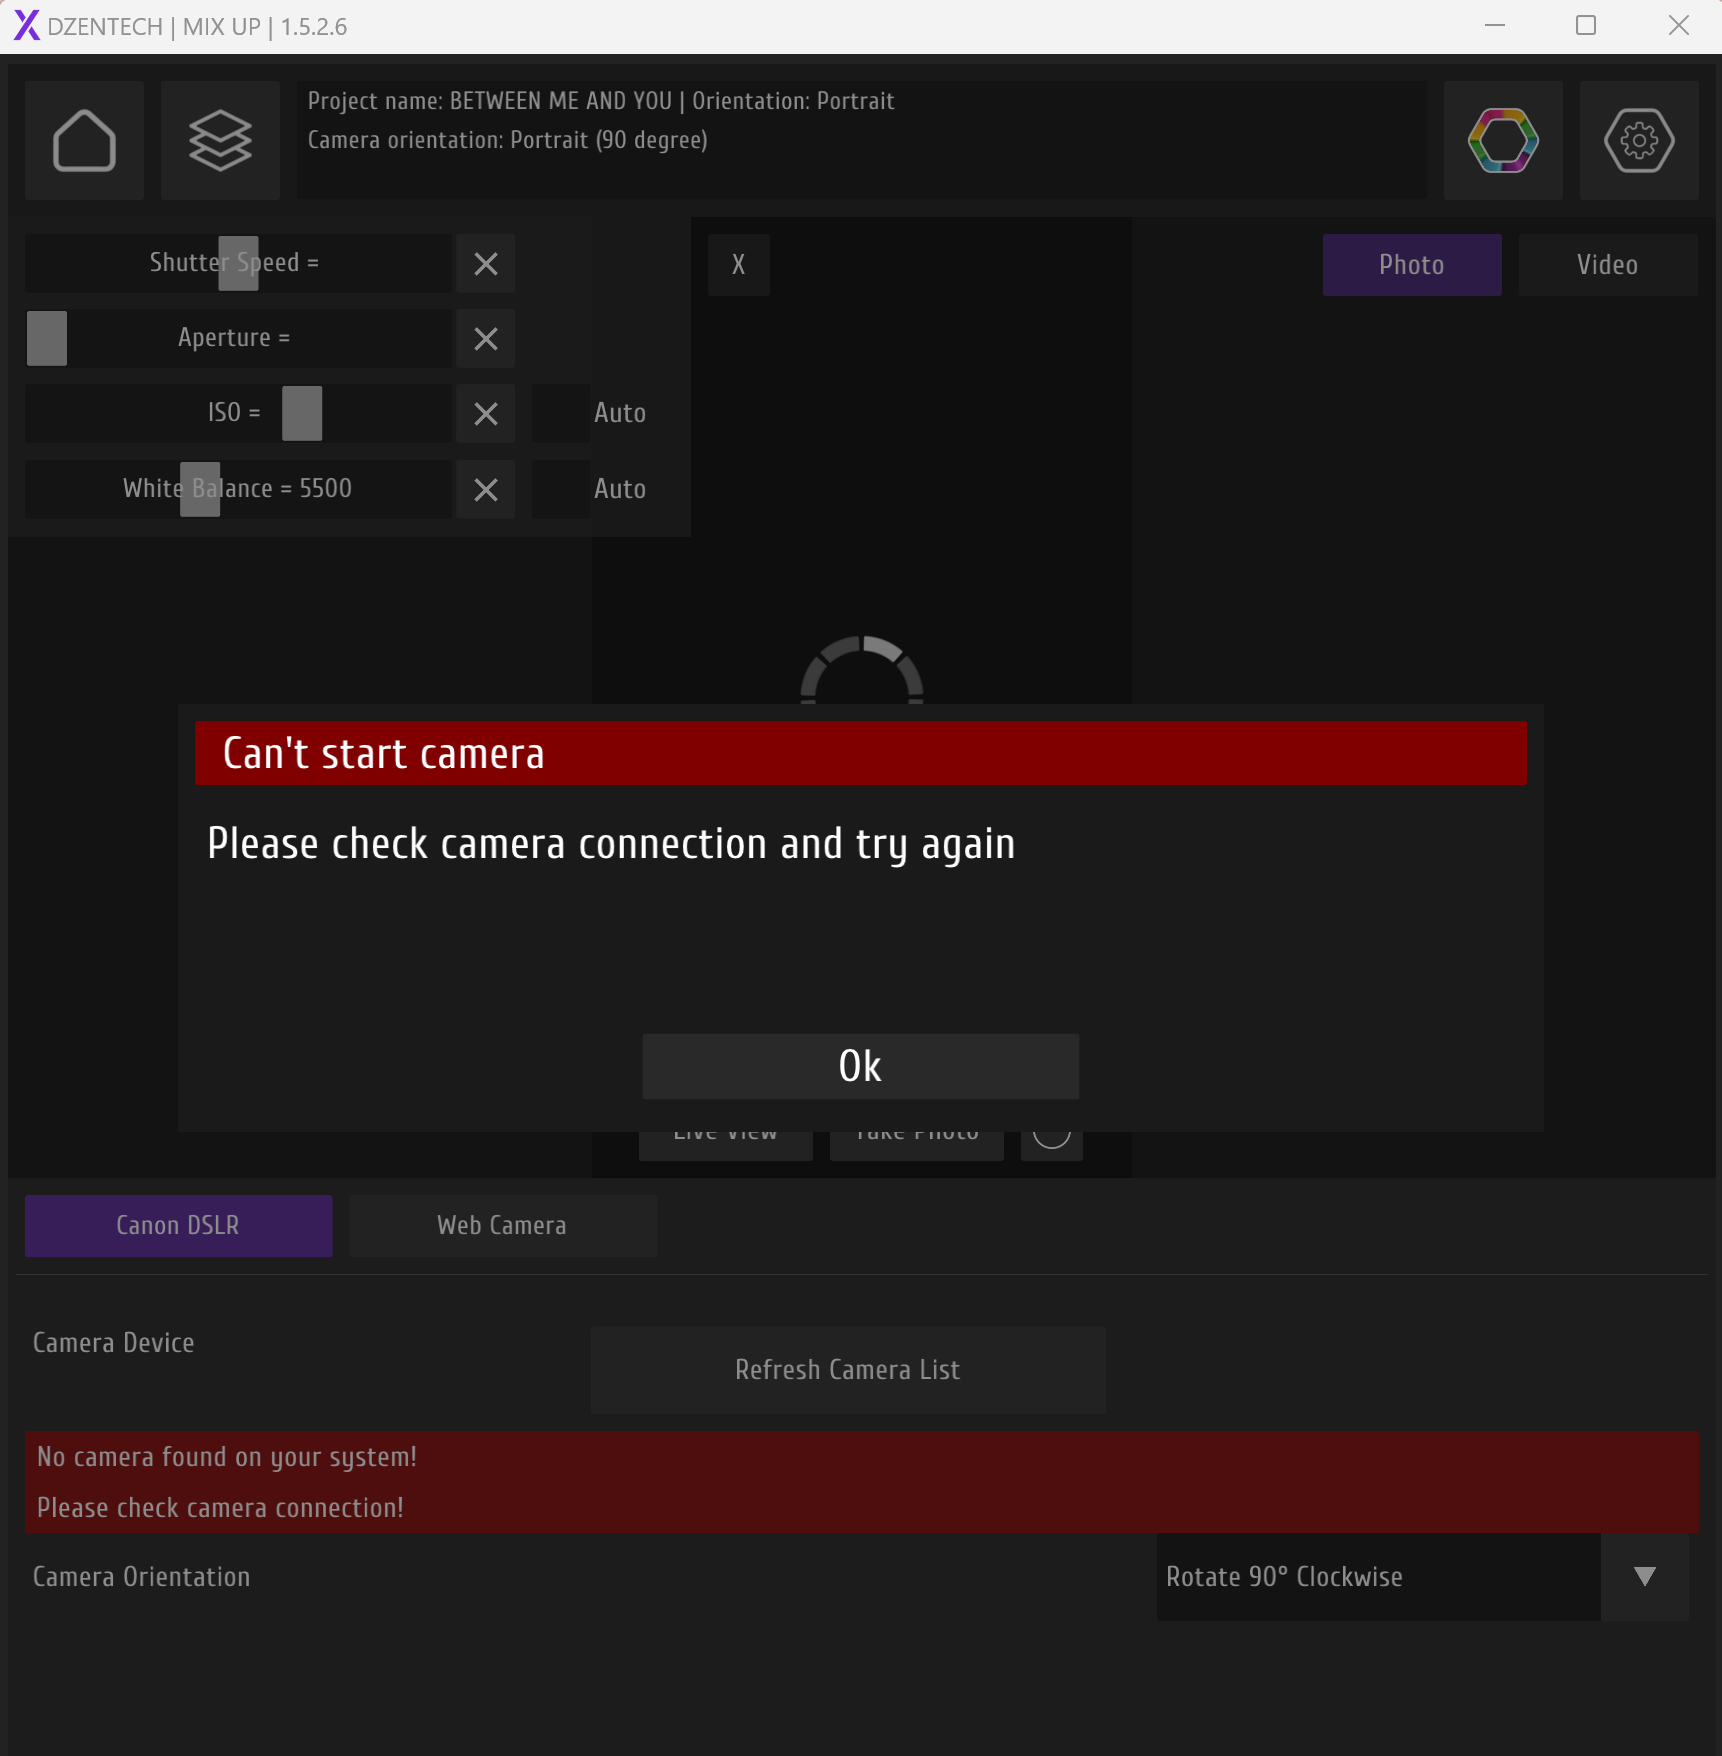
If you see the error like this, then it means that your camera is not connected, turned off or not in M mode. Please check all cables. In case if you use a MixUp photo booth, then check:
- that the type-c cable is connected to your surface in the front side of the booth
- usb from the camera is connected to the usb port inside the booth in a back panel.
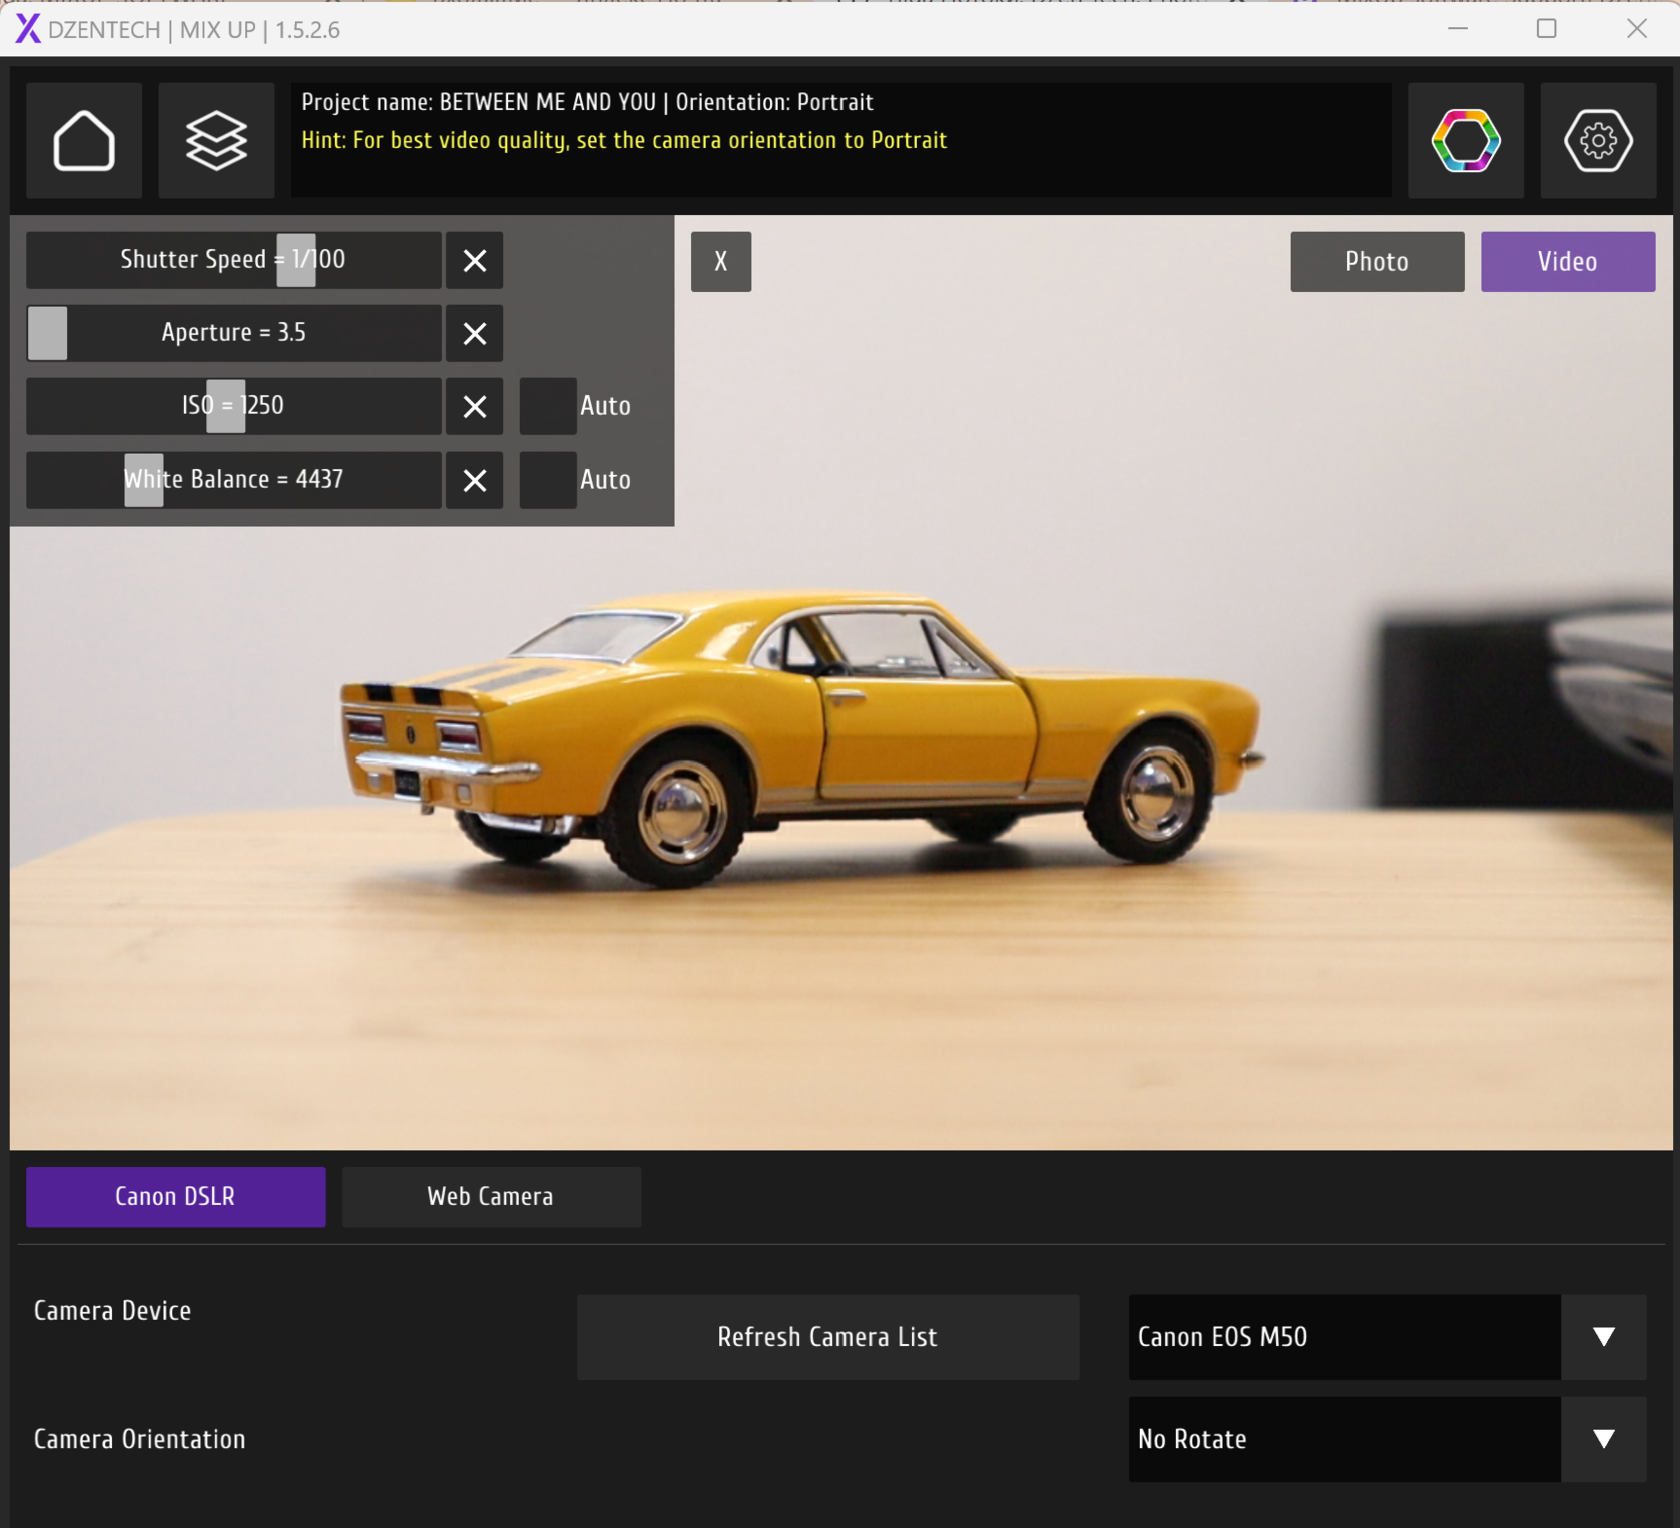
There are different settings for the video and photo.
Also, you may switch between Canon DSLR and webcam settings.
Don't forget to select your camera in "Camera Device".
If you plan recording vertical videos and to set camera in a vertical position, then don't forget to set the right camera orientation.
You can change all setting of the camera. I don't recommend using the 'auto" mode because it doesn't always look good.
Our default settings for the camera are:
Shutter speed 1/100
Aperture 3.5
ISO 600
White Balance 4500
Don't forget to set your light before making changes in camera settings. If you use the MixUp booth, then I recommend checking this guide.
If the picture is too yellow, then I recommend lowering the white balance (or to increase it if it's too blue).
If you already set the light to maximum settings, but want the picture to be brighter, then increase the ISO.
If you already set the light to maximum settings, but want the picture to be brighter, then increase the ISO.
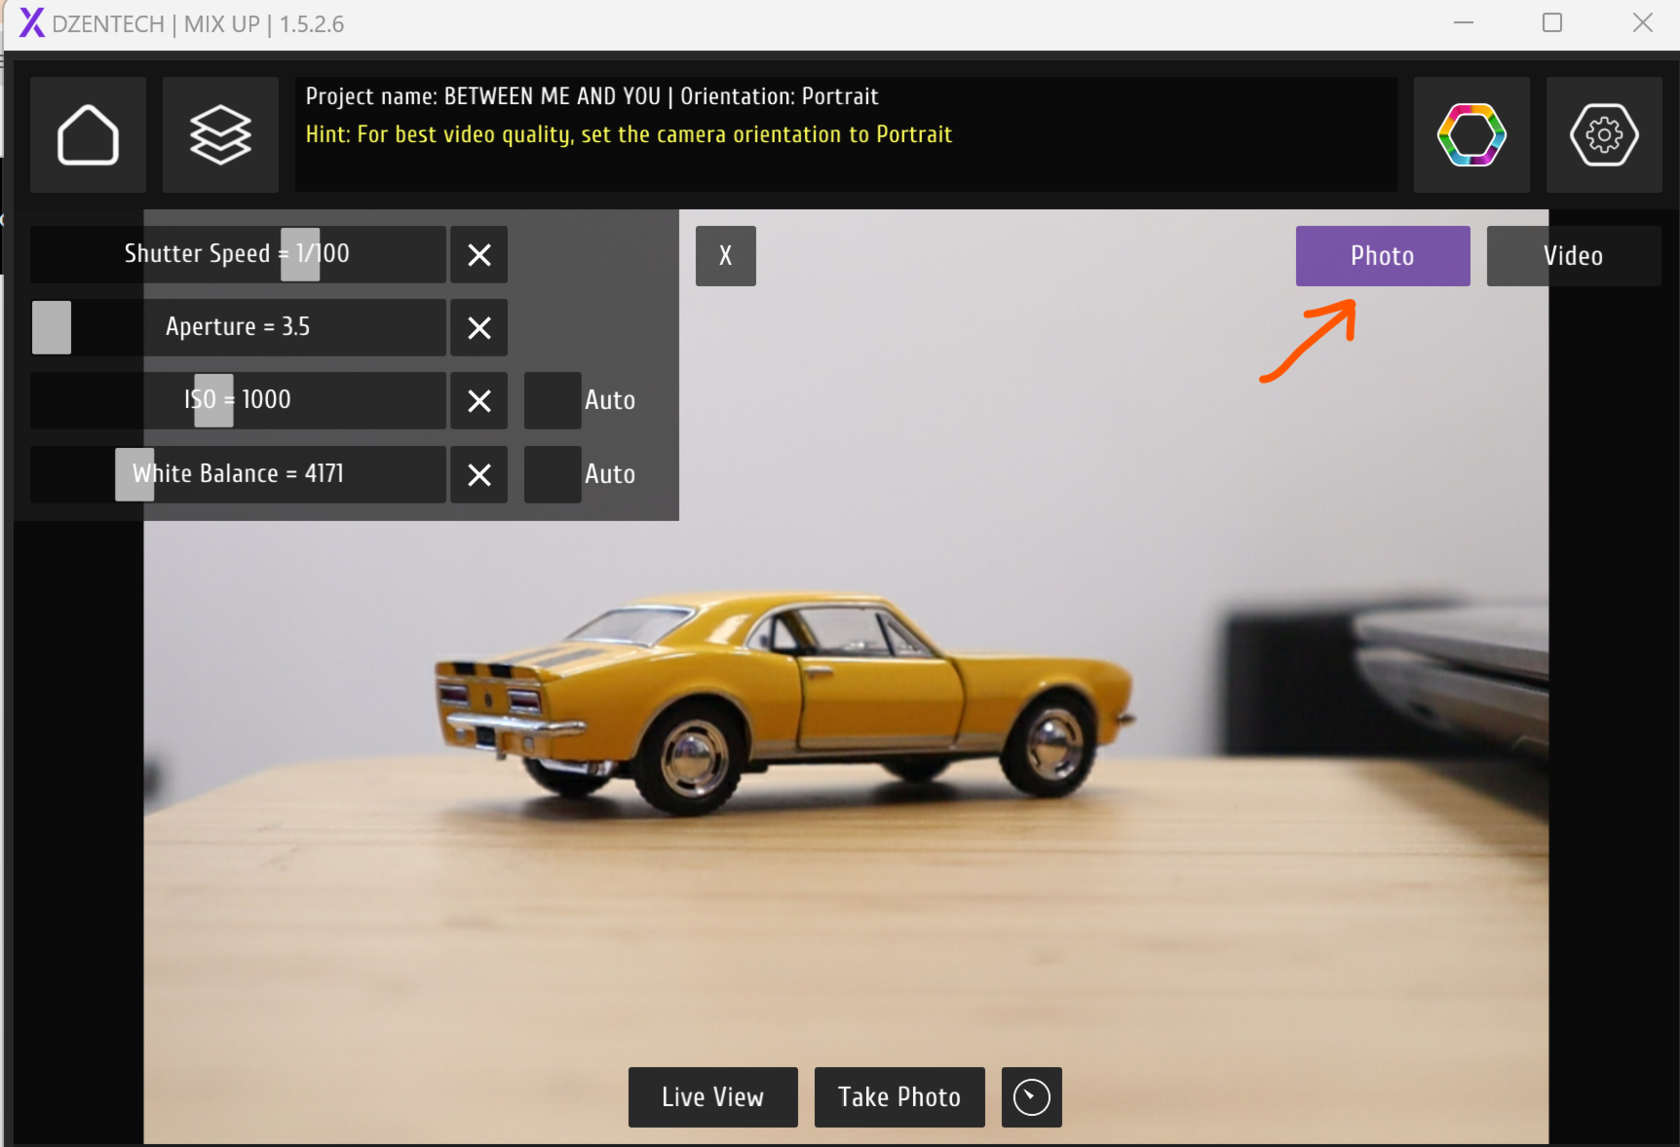
Settings for the photo need to be set in a separate tab.
Please note that to see the final result you need to click at "Take Photo". Live view won't show you the correct result (it's made like this, so you could test all settings with a flash too).
Please note that to see the final result you need to click at "Take Photo". Live view won't show you the correct result (it's made like this, so you could test all settings with a flash too).
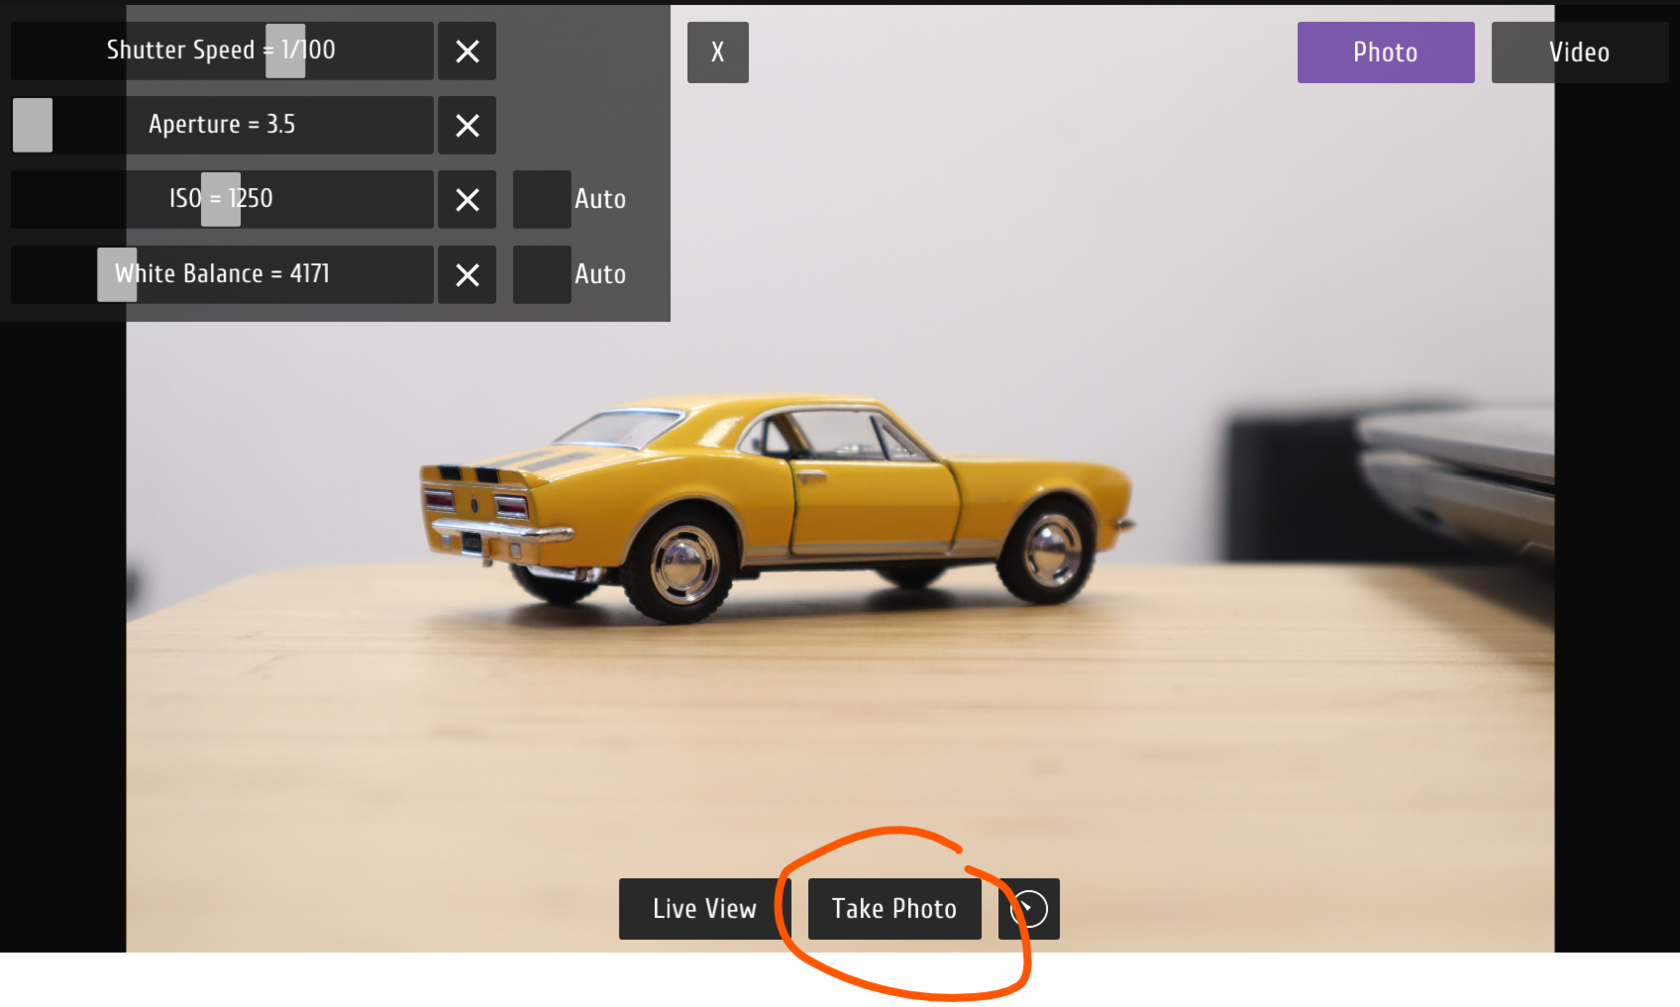
So you set all settings and then press "Take photo" to see the final result.
It's also possible to set a timer from 2 to 9 seconds, so you could go to the position you need.
It's also possible to set a timer from 2 to 9 seconds, so you could go to the position you need.