

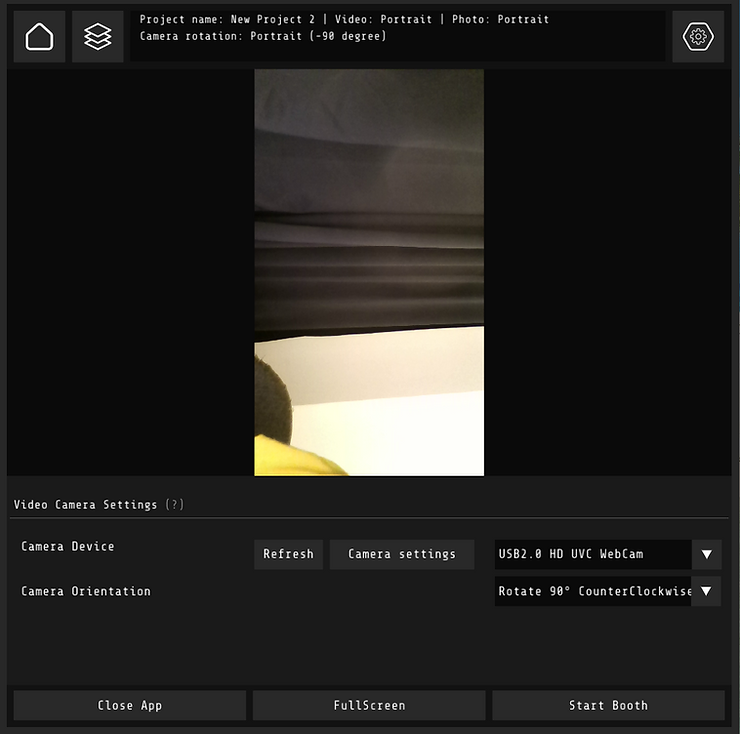
When you open the app, you'll see this screen. On the left side, you'll see the preview of your video.

2. Camera tab
The first thing you need to do is to connect your camera. The software works with webcams (not all. Check the Logitech Brio model) and DSLR, GoPro cameras connected by video capture device(check the list of potential devices).
If you don't see your camera in a list, then press refresh and check again.
If you want to create vertical videos, then you may want to rotate your camera and video.
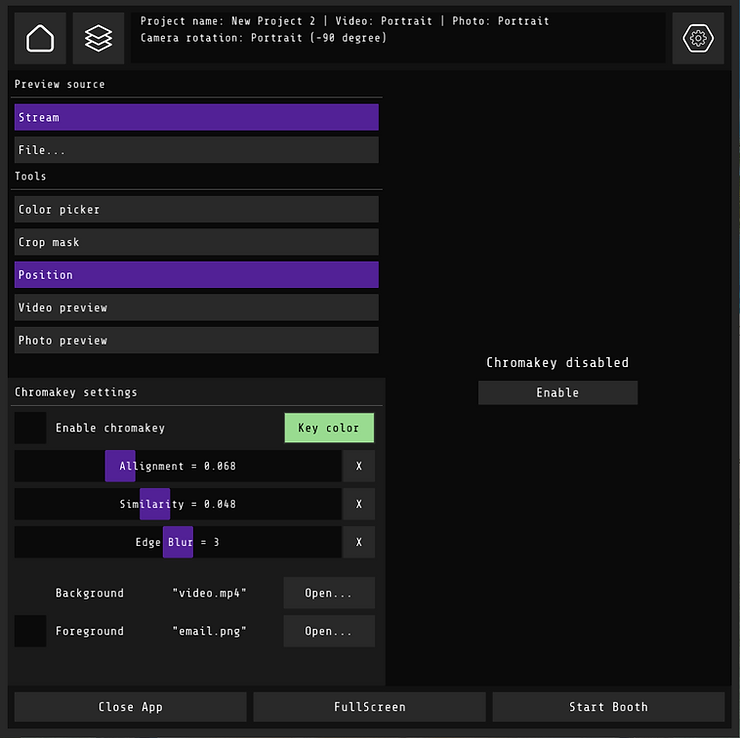
3. Chroma key tab
By default in preview sourse the stream is turned on, so you'll see the image from your camera. If you want to check one of the archive videos, then please use the "file" button.
Don't forget to enable the chroma key to see the preview.
The color picker allows you to click on the area you need to cut to be selected. You'll see that it will disappear.
If you selected the background, then you'll see it instead of your selected color in "preview" and "position".
A crop mask allows you to cut areas that you don't want to see in the video.
The position allows you to move the person and scale.
Video and photo preview will show you the preview.
Alignment, similarity, and edge blur need to be selected according to your image.
In the background, you can load photos or videos.
You can use png overlays as a foreground.
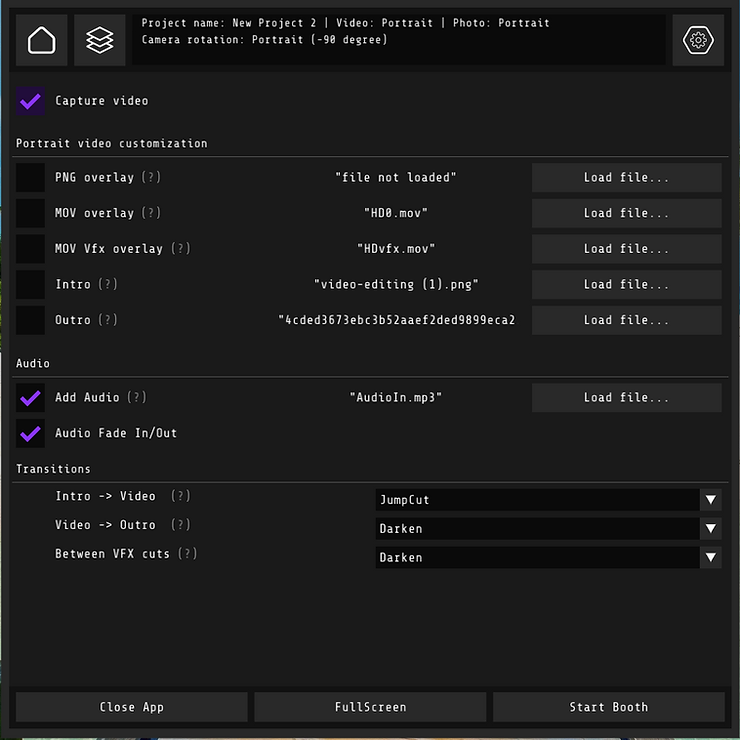
4. Video tab
Here you can select if you want to make videos and to add your customization. When you point at the sign of questions, it shows info about the file you need.
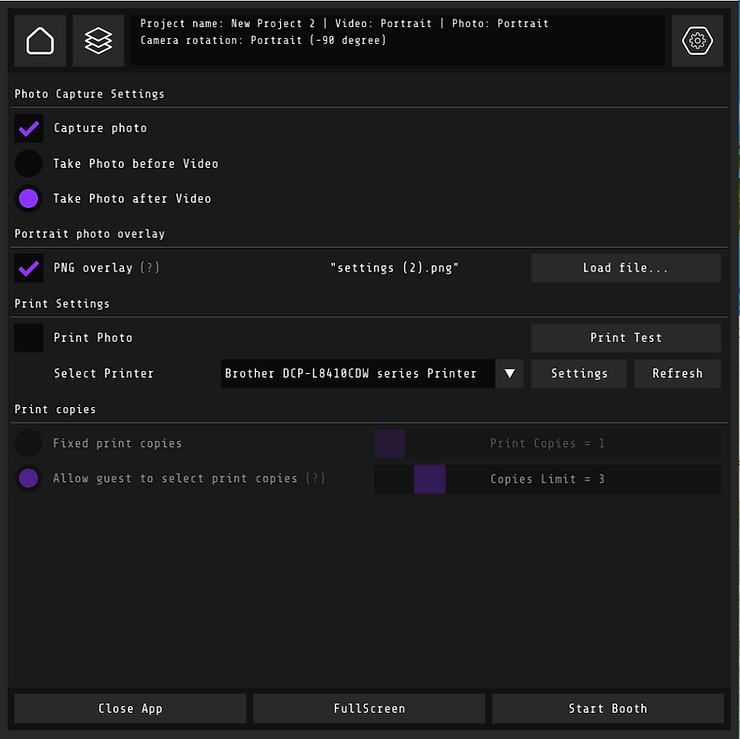
5. Photo tab
Here you can select/deselect making photos, load your branding, select when the photo will be taken.
You can also print the photo and then select several copies( or let users decide).
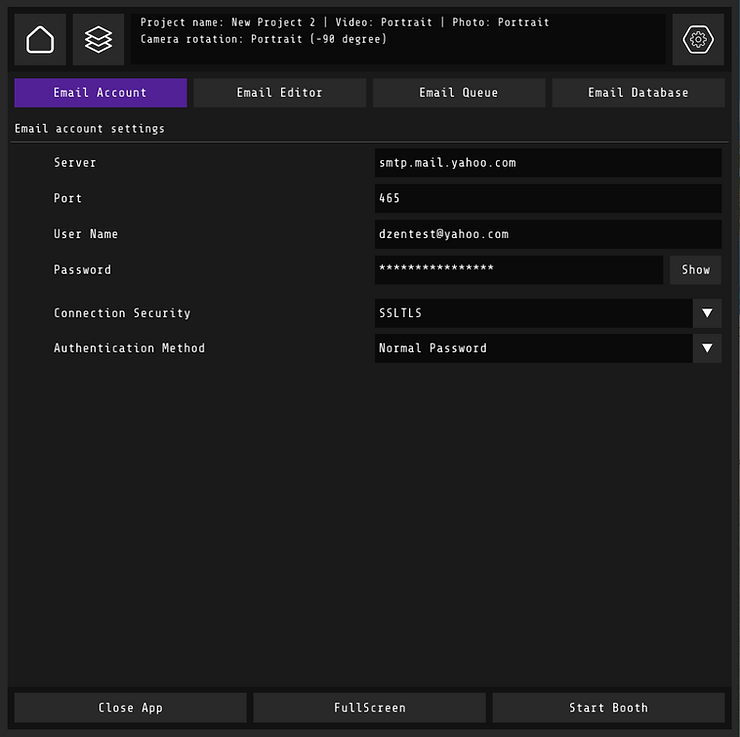
6. Sharing
You can text your email's name and password.
For Gmail settings are
smtp.gmail.com
465 port
Don't forget to allow appsina google account.
In the email editor, you can edit emails that guests gonna receive.
Email queue allows you to see the current queue.
Email database collects information about all guests.
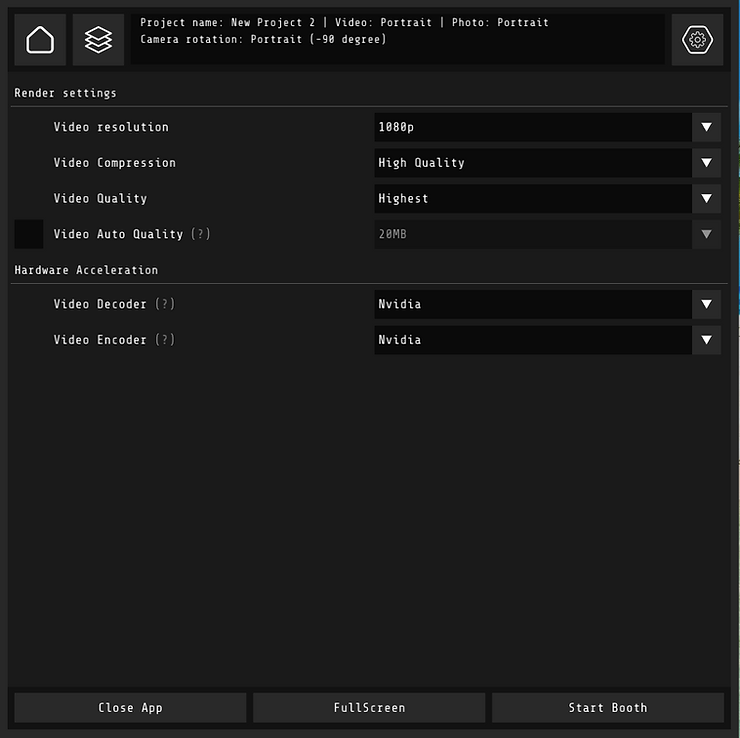
7. Render tab
Here you can set your resolution. For events we recommend 720p.
In video compression settings we recommend selecting high quality. If the rendering takes a long time, then select high speed.
We also recommend turning on auto quality and to set it to 20 MB.
For hardware acceleration settings you need to check one by one to find the best option for your laptop.
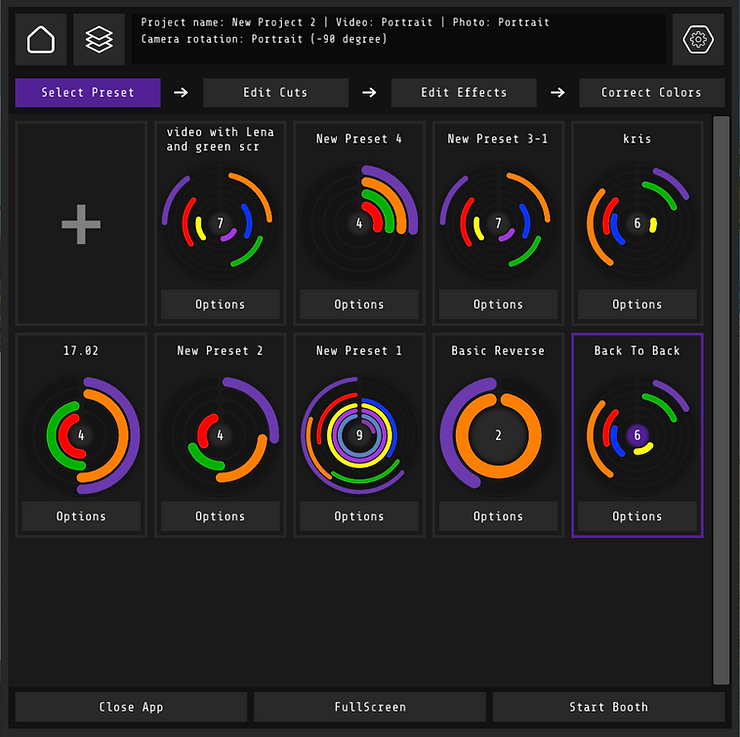
8. Presets tab
Here you can select one of your prepared settings.
In edit effects, you can edit effects for each part of your video.
In a color correction you can change the contrast, saturation, and etc.
9. Edit cuts
This setting is for PRO users. We'll make a separate guide about it.
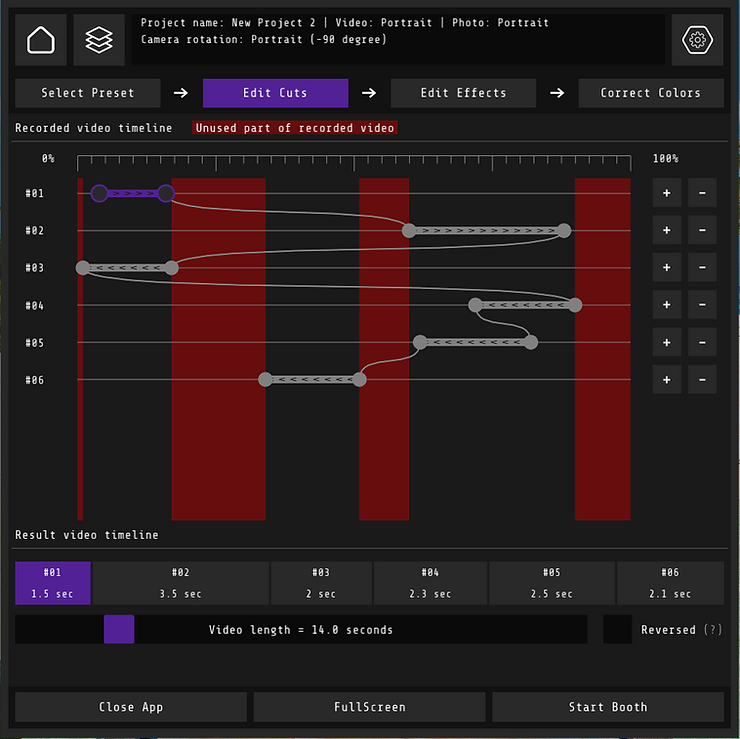
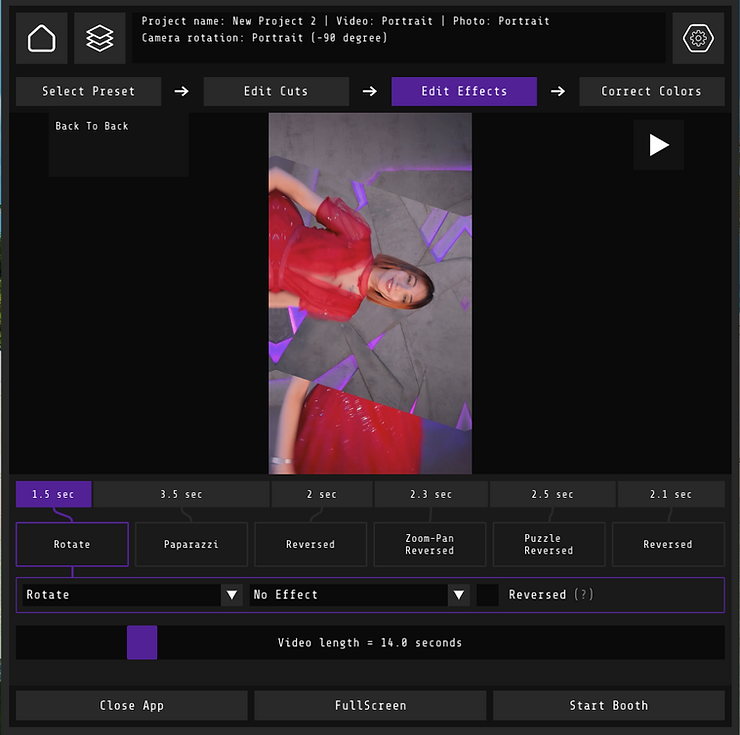
10. Edit effects
In this tab, you can select a specific effect for each part of the video and to change the video length.
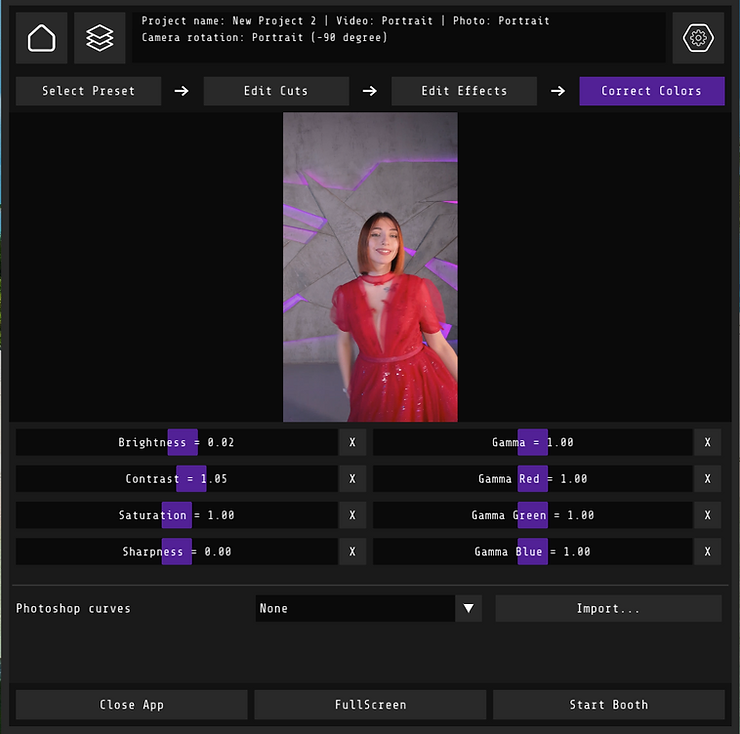
11 Color correction.
Here you can change the color setting of your video.
We usually add a little bit of contrast.
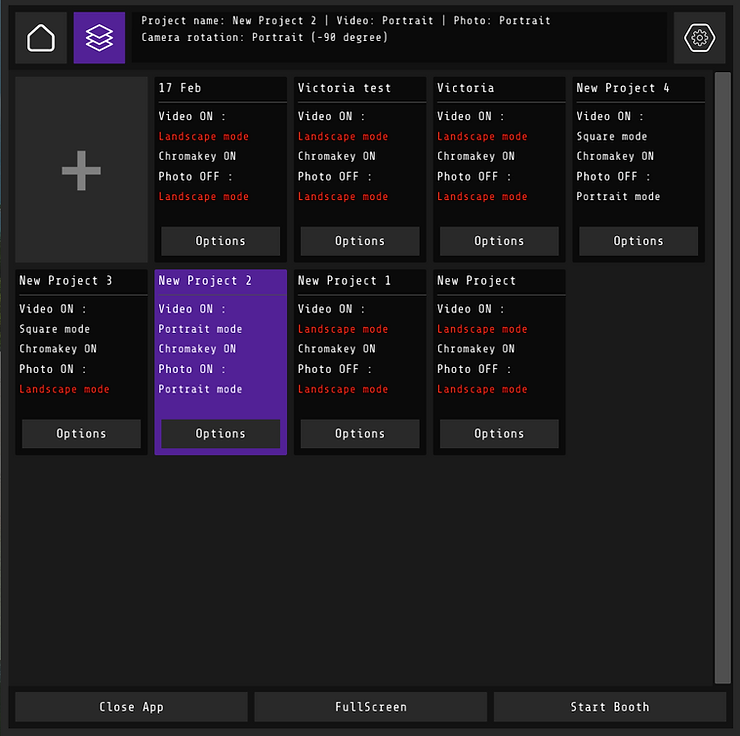
12. Project tab (the second from the left in a left top corner).
Here you can create the project for your event. All customization settings will be saved for it.
Presets will be the same for all projects.
When you create the project it's needed to select the orientation of the camera.
It's also possible to duplicate and delete projects. Convenient when you have a lot of events during the week.
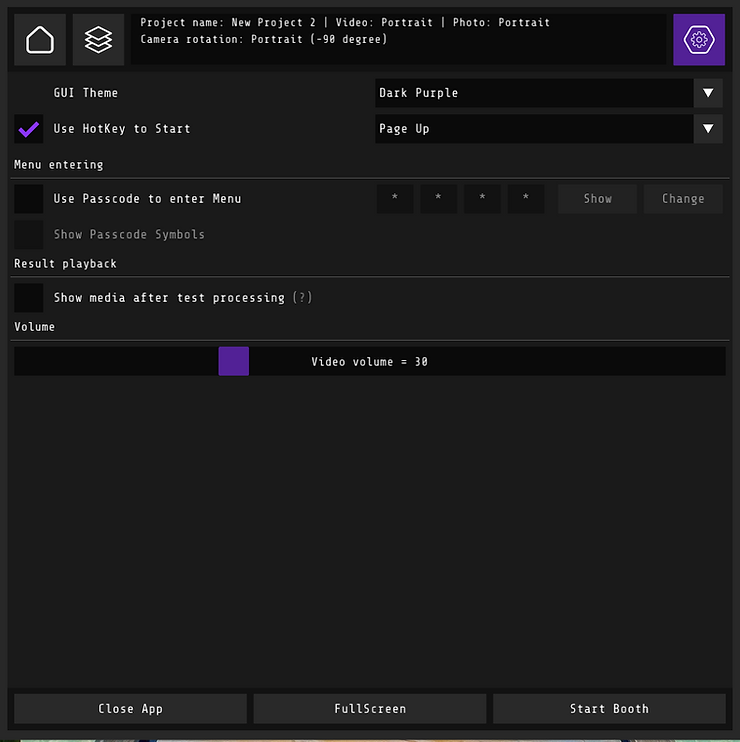
13. Settings
Here you can select the theme that you'll see (not guests)
When the hotkey is activated, then you can also use a remote presenter to start recording.
You can also select some passcode for the menu for guests who couldn't open the app screen.
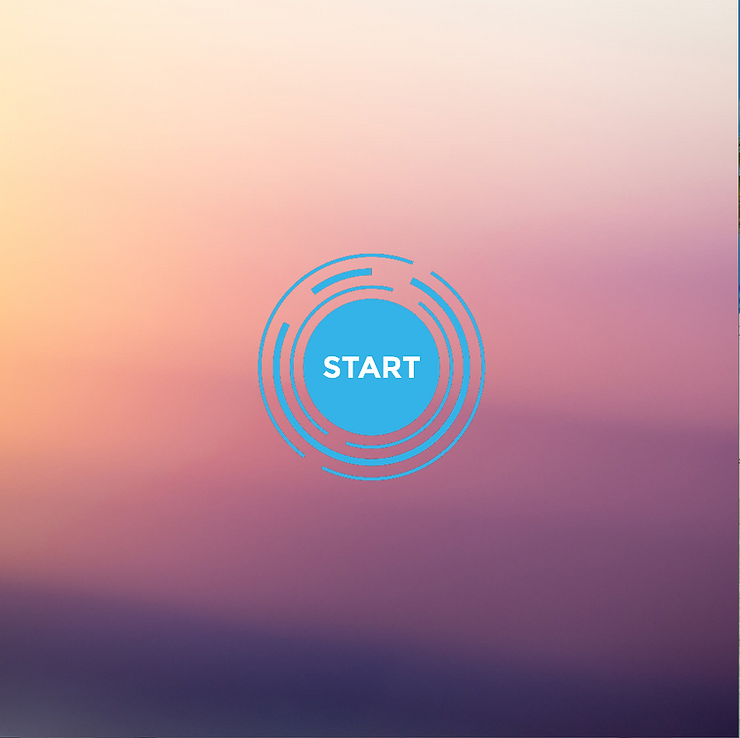
14. Main screen (start booth)
That's an example of the start screen. To exit this screen you need to swipe from the left to the right on top of the screen. You can also tab 3 times in a top part of the screen.
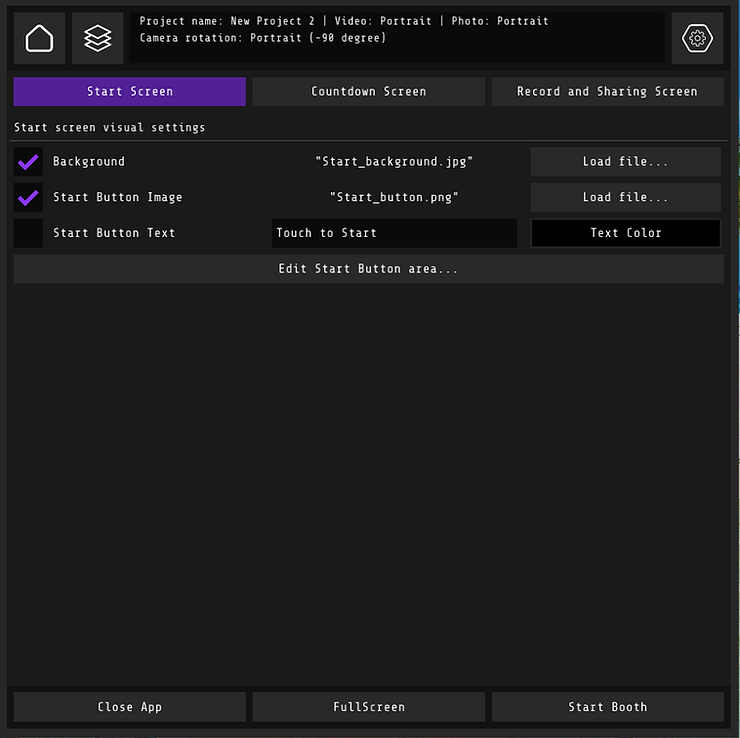
15. Booth screens
Customization of screens that guests will see.
Media shows folders with the archive and final videos and photos.
The test button is used for rendering archive videos and photos with new settings.